Custom monitor standoffs for VESA mounts
I decided to mount my Dell S3422DWG curved monitor to consolidate space and ensure my cats couldn't tip it over. I bought a pole mount monitor arm for the task.
The arm itself - a mount-it.com MI-391XL "Full Motion TV Pole Mount" fit the bill quite well. The problem is that the curve of the monitor means the VESA mounting holes are inset and the arms of the mount plate don't fit flush.
The usual fix is to use the stand-off spacers and a longer screw. This worked for other monitors I've mounted, but this time I couldn't find the right length of screws to ensure they would have enough thread in and at the same time not be so long to touch the LCD screen or any of the other electronics inside.
Before I go too far, I'm going to do all of this in metric units since the VESA mount measurements and fittings are all metric. I'm sure I'll mess up something in the conversion from SI to metric ... my apologies.
Brainstorming at a hardware store
My Dad was always good about coming up with some ideas to make things work within the constraints of the problem. Usually at home, the constraint was cost - so the solutions were often made from scrap 2x4 we had in the garage at the time. Failing to find anything at home, his next trick was to go inside, have a cup of coffee, doodle on a piece of paper, then head to the hardware store.
So I followed his lead - had a cup of coffee, got a rough idea in my head, then went to the local Ace Hardware store.
Optimally I needed a metric threaded bolt of diameter M4 (4mm diameter), and after some rough calculations, decided they needed to be at least 32 but no longer than 37 mm long.
The store usually stocked them in 5mm increments, so a 35mm bolt would have been fine. But their next size up wasn't 40mm - it was 60mm - way too long.
I had thought about this contingency and planned on buying some threaded rod. That was even harder to source locally, so I was stuck there too.
But for my case, the 60mm was essentially a "threaded rod" for my needs. So I improvised this solution.
Threaded rods, nylon stop nuts, Hex nuts, and some guestimating
I walked out of the store with these in my bag:
- 5x M4 Size x .7 Pitch - 60mm long phillips head machine screws
- 10x M4 Size x .7 Pitch - Metric Hex Nuts
- 10x M4 Size x .7 Pitch - Metric Nylon Insert Stop Nuts
I also used some generic flat washers, about 10mm diameter, that I had from a previous project.
After cutting the heads off of the machine screws, I had four (and a spare) threaded rods about 60mm long. Good enough for my needs.
Standoff construction
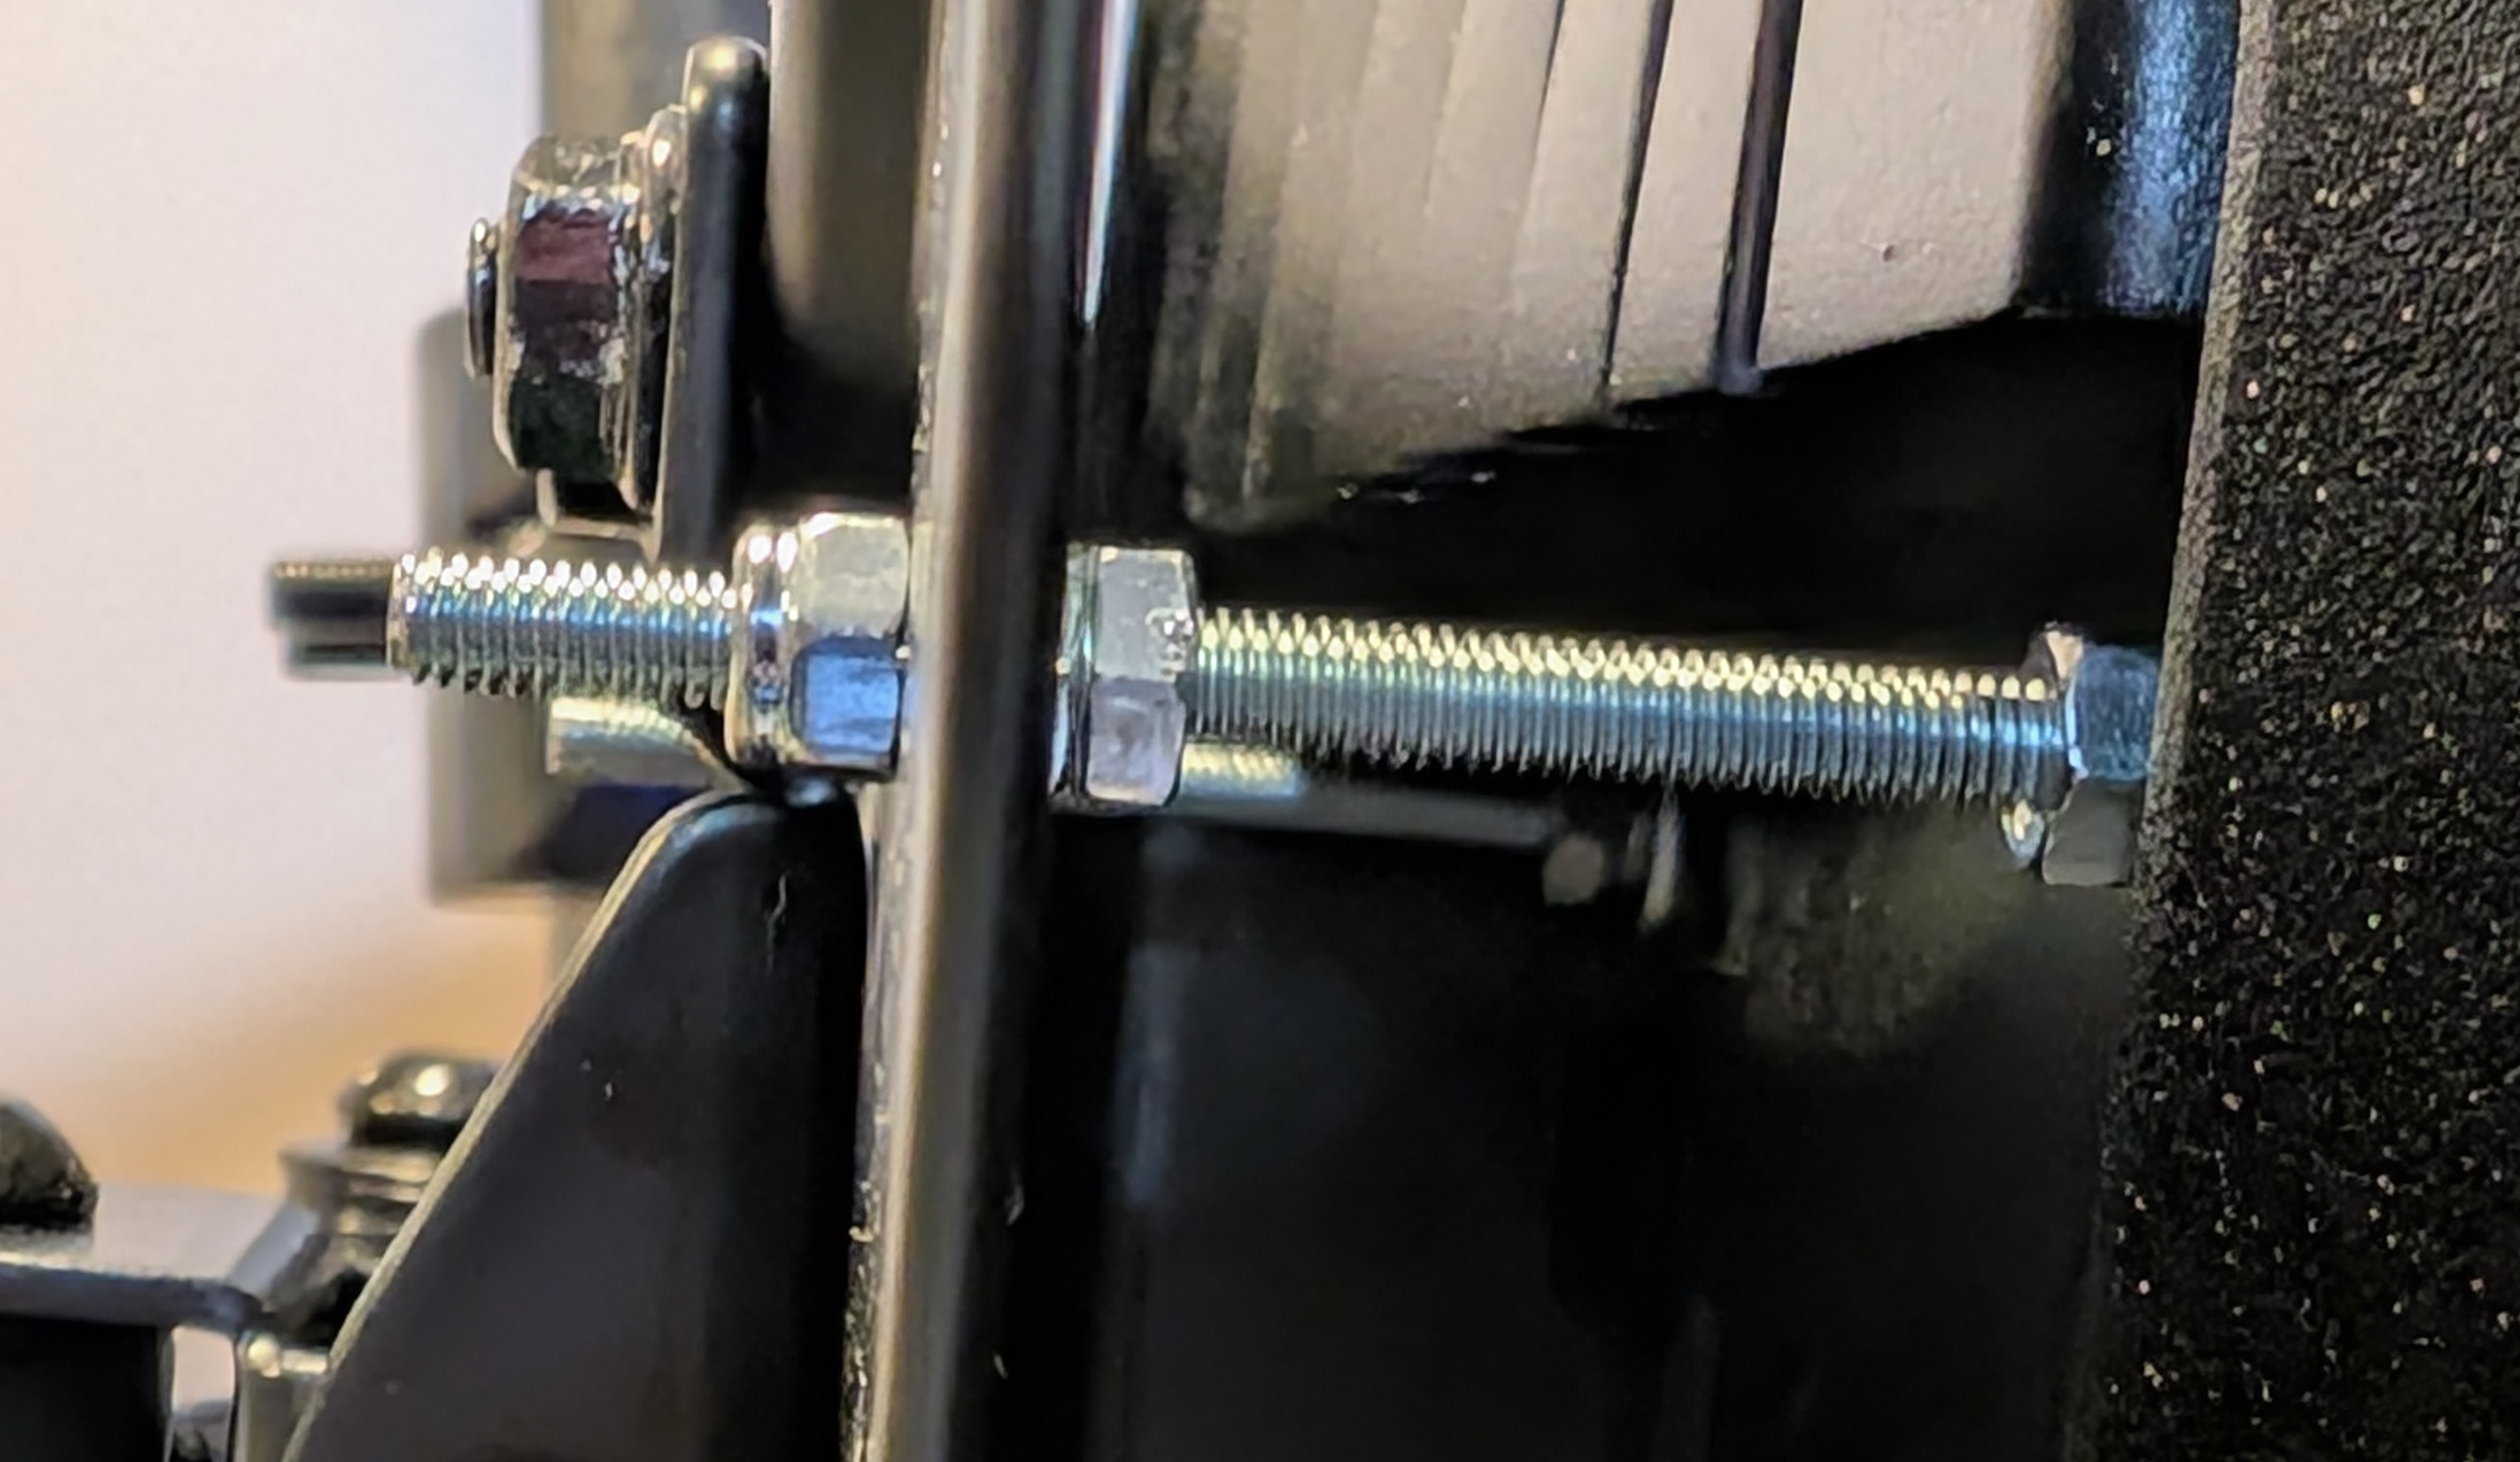
So I took each threaded rod and put one of the nylon insert stop nuts on one end, about 5-6mm from the end of the rod, then on the other end I put two of the hex nuts, again about 5-6mm from the end of the rod.
From measuring the original VESA mount screws that came in the monitor, they had about 4-5mm of thread exposed - I assume this is sufficient for the weight and didn't go too far to damage anything internally. My intent is the nylon stop nut would be on the monitor side of the threaded rod when it was all installed - it won't easily move and go deeper as I was tightening things. I also placed one of the washers between the back of the monitor and the nylon stop nut to give a bit more surface area for the nut against the monitor.
With all four installed, I then placed the monitor mount over the four studs and let it rest on top of the pair of hex nuts. The monitor was placed face down on a pillow on a table - this made adjusting all four studs very easy.
In this face-down position, I adjusted the hex nuts so they each had about 10mm exposed above the plate. I took off the plate and carefully turned the lower hex nut up against the top hex nut (the one touching the VESA mount) making sure it didn't move up the threads. I continued this about a quarter turn after they touched to ensure they were "locked" against each other. I then placed the mounting plate back, and used four remaining nylon insert stop nuts to tighten things up.

In the image above, you can see the "raw" materials at the top: the washer, a couple hex nuts, and the nylon insert stop nut, below them is the original 60mm machine screw.
The lower part of the image shows the screw with the head cut off (lower right corner), the nylon insert stop nut on the left end, the washer next to it, and the two hex nuts on the right.
Final thoughts
I was a bit concerned that such a long mount bolt would make the whole mounting "squishy", but it really is a very tight and solid mount when the screws and mounting brackets aren't exact.
Here are a couple photos of the standoffs in place holding the monitor - these are taken from the side and you can see that there's no bending or bowing of the standoffs.